 Solarfiles.com Solar Power Energy Information
To install solar panels in a home can often cost many thousands of dollars, encompassing both the price of the product and the cost involved in hiring a professional to install them in the correct way. But what if there was a way to build inexpensive solar panels at home and to get them set up without the need for a professional in the field?
Well, this is actually a reality as there are many websites online that can guide the homeowner through every step of creating their own inexpensive solar panels, as well as the installation of them in an appropriate area. Without spending thousands families all over the United States could easily be saving hundreds of dollars a year on electricity bills by just spending a few hours constructing these amazing devices that use the Sun’s energy to create the power needed for the home. Although they probably won’t be able to replace all of the electricity bought from a power company, they will certainly be able to supplement it to a very large degree.
Whilst there is not enough room to go in to detail on this page regarding the various steps needed to build a solar panel at home, there is enough room to go over what items will be needed and to provide a general overview of the process. For more detailed descriptions of building a homemade solar panel, there are hundreds of web resources providing excellent instructions.
To start the homeowner will need to source a sheet of copper, which is the only financial cost that will require some thought. A $200 sheet of this material will, however, be enough to create 5 different solar panels which means that the money saved will more than cover the expense within a year. Also needed will be some alligator clips, some plastic bottles, slat water and a current meter – all of which are easily found and cheap to buy (the current meter can probably be borrowed from a friend as it is only needed for testing purposes).
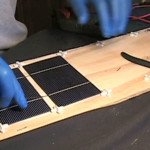
The trickiest part of the whole project is preparing the copper for use, which starts by cutting two circular discs from the sheet and placing one of them over a high heat. After about two hours it can be removed and cleaned, before both are inserted in to the bottle, being careful that their final resting spot is not touching each other. The alligator clips are then attached and the bottle is filled with salt water. Finally the alligator leads are connected to the current meter, which should instantly prove the solar panel is working! All that is needed now is a suitable place on the roof and the household has finished work on their first solar panel, thus meaning they are doing their fair share for the protection of the environment.
As can be seen the construction of solar panels is neither difficult nor expensive, meaning that anyone can do it. For more detailed instructions search for the topic on any of the major search engines online.


